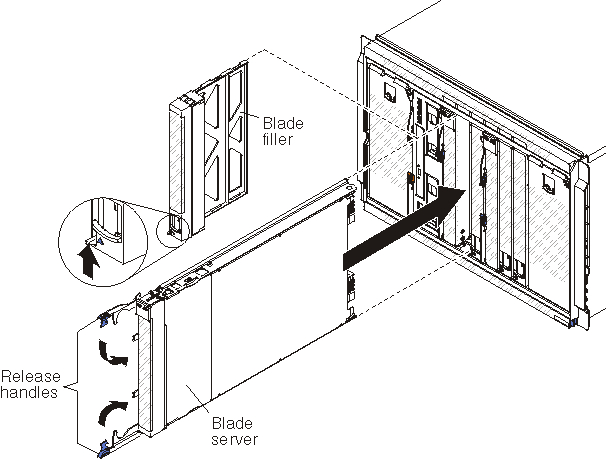
To install a blade server in the front of the BladeCenter S chassis,
opening the release handles on the blade server, slide it into a blade server
bay, and close the release handles.
Before installing a blade server into
BladeCenter S chassis,
read the instructions that come with that blade server. In addition, make
sure that you have installed any optional hardware devices, such as a SAS
expansion card option, in the blade server.
For more information about blade servers,
see the blade server documentation.
To determine
which blade servers are compatible with the BladeCenter S chassis,
see the IBM ServerProven Web site.
-
Select the bay for the blade server. Depending on
the blade server type and the optional devices that are installed in the blade
server, two or more adjacent bays might be required.
Important: If
SAS connectivity modules are
installed in the
BladeCenter S chassis,
the blade server bay that you use when installing a blade server is determined
by the
SAS connectivity module zoning
configuration that you have selected for the
BladeCenter S system.
See
Planning for SAS connectivity module zoning for more
information about zoning configuration.
-
Open both release handles (rotate the top handle up and the bottom
handle down).
-
Slide the blade server into the blade server bay until it stops.
-
Close both release handles (rotate the top handle down and the
bottom handle up).
-
(Optional) Write identifying information on one of the labels that
come with theBladeCenter S chassis;
then, place the label on the BladeCenter S chassis top
bezel, just above the blade server.
Important: Do
not place the label on the blade server or in any way block the ventilation
holes on the bezel.