Use the rack template and the rack installation kit that comes with the BladeCenter S system to correctly install it in a rack.
Before you begin, review the Installation guidelines.
If you are installing the BladeCenter S chassis in the Office Enablement Kit, see Installing the BladeCenter S chassis in the Office Enablement Kit .
Rack requirements:
- Make sure that the room air temperature is below 35°C (95°F).
- Do not block any air vents; usually, 15 cm (6 in.) of air space in the rear and 5 cm (2 in.) in the front provides proper airflow.
- Three or more people are required to install the device in a rack.
- Do not leave any unused U space within a rack open. Blank filler panels must be used to prevent recirculation of warm air.
- Install your BladeCenter S chassis only in a rack cabinet with perforated front and rear doors or in a rack that is equipped with an IBM Rear Door Heat eXchanger.
- Do not extend more than one device out of the rack at the same time.
- Remove the rack doors and side panels to provide easier access during installation.
- The rack-mounting flanges must have holes and clearances per EIA-310-D.
- Make sure that there is sufficient room in front of the front EIA flange to provide minimum bezel clearance of 70 mm (2.76 inches) deep.
- Make sure that there is sufficient room behind the rear of the rear EIA flanges to provide for adequate cable management and routing.
- Rack weight-handling capacity must be sufficient for the aggregate weight of the BladeCenter S chassis, blade servers, power distribution units, and power cables.
- The rack must be stabilized with stabilization brackets and leveling pads so that it does not become unstable when it is fully populated.
To install the BladeCenter S chassis in a rack, complete the following steps:
-
Make sure that you have all of the parts of the rack installation
kit that are needed to install the BladeCenter S chassis in
a rack. If any parts are missing or damaged, contact your place of purchase.
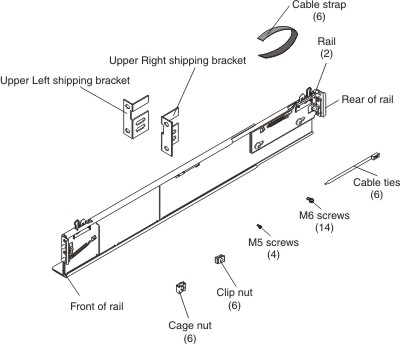 Note: Left and right shipping brackets are required only when the BladeCenter S chassis is shipped while it is installed in a rack cabinet. An initial set of shipping brackets is provided in the rack installation kit. If you need to order additional shipping brackets, you must order the miscellaneous parts kit.
See Rear view parts listing for the miscellaneous parts kit part number.
-
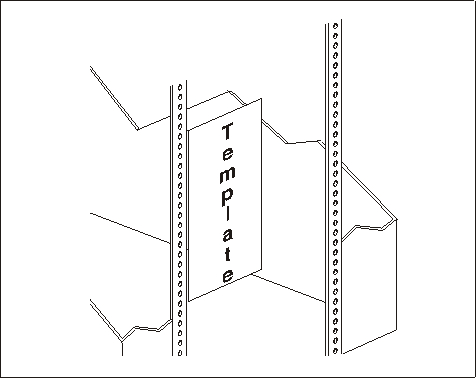
Position the rack-mounting template that is supplied
with your BladeCenter S system on
the rack so that the edges of the template do not overlap any other installed
devices. Line up and select the holes on the front and rear of the rack in
the locations that are indicated by the arrows on the template.
-
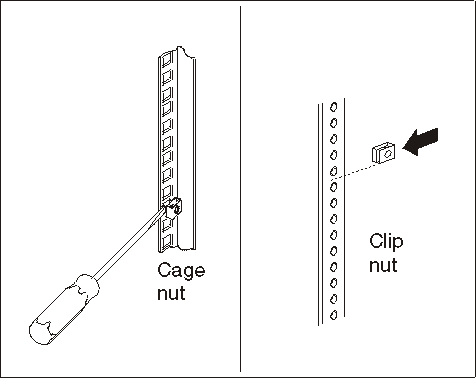
Use a screwdriver to install the cage nuts or the clip nuts, as
required for your rack, in the locations that are indicated on the template.
Note: For racks with square holes, use the cage nuts. For racks with round holes, use the clip nuts.
-
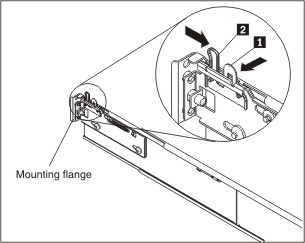
Before you install the rails in the rack, fully
extend each rail. A set of rail pins and a mounting flange are on each end
of the rail. Retract the rail pins by pressing in the rail latch 1 and
then pulling the finger pull 2 toward the center
of the rail.
-
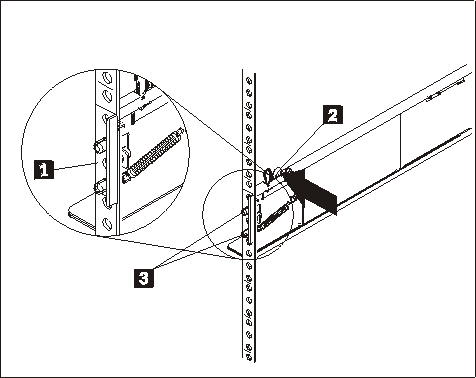
Position the rail in the desired location on
the rack and align the pins on each end of the rail with the applicable holes
on the rack 1 . Release the rail latches and finger
pulls 2 on each end to allow the rail pins to
pass through the rail and the mounting flange 3 .
Repeat steps 5 through 7 for the other rail.
Note: Make sure that the rail pins protrude through the mounting flanges and the rack cabinet rails.
-
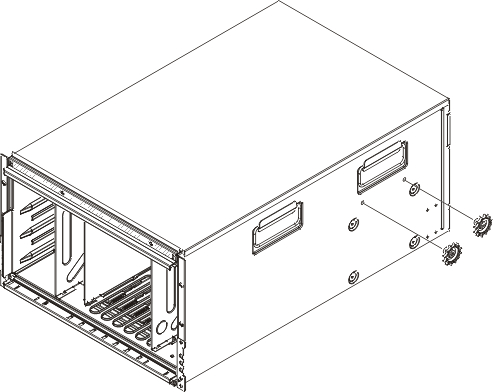
Remove the two blue shipping screws from each side of the BladeCenter S chassis.
-
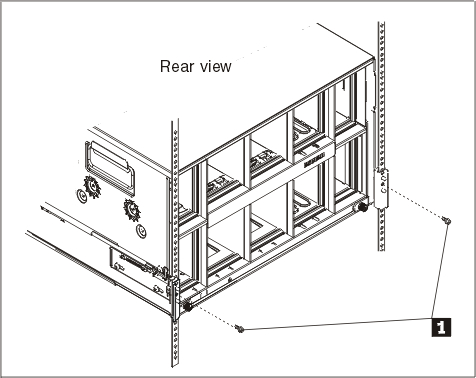
Slide the BladeCenter S chassis into
the front of the rack. Insert one M6 screw 1 in
the center hole of each rail on the rear of the rack cabinet.
-
Optionally, install the shipping brackets. There is a set of shipping brackets provided in the BladeCenter S chassis rack
installation kit.To install the upper right shipping bracket (if you are facing the rear of the BladeCenter S chassis):
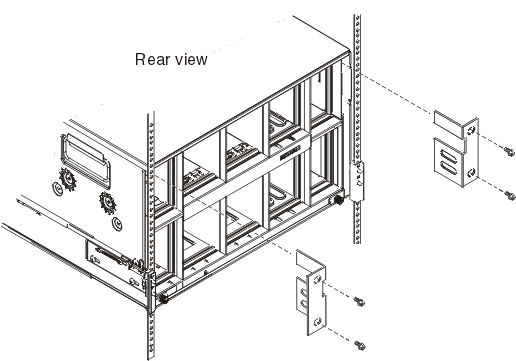
- Align the first shipping bracket so that the bottom of the shipping bracket will fit into the slot to the right of power module bay 1. Insert the shipping bracket into the slot.
- Align the holes in the shipping bracket with the holes in the rack cabinet.
- Secure the shipping bracket to the rack cabinet with the screws that are provided.
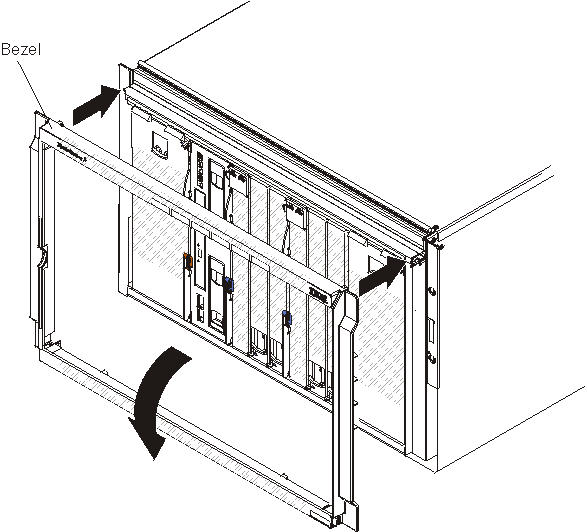
-
Install the bezel on the front of the BladeCenter S chassis.