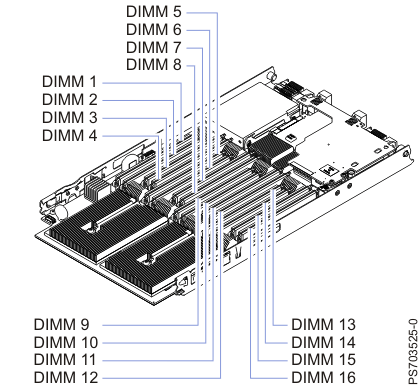
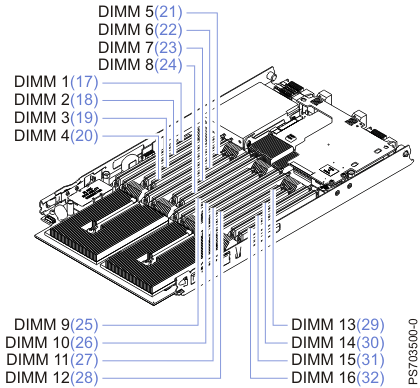
You can remove a very low profile (VLP) dual-inline memory module (DIMM) from a PS703 blade server, or from either the base unit or the expansion unit of a PS704 blade server.
- Read
the Safety topic and the Installation guidelines.
- Shut down the operating system, turn off the blade server, and remove the blade server from the BladeCenter® unit. See Removing the blade server from a BladeCenter unit.
- Carefully lay the blade server on a flat, static-protective surface, with the cover side up.
- Open and remove the blade
server
cover. See Removing the blade server cover. Note: If you are servicing the base unit of a PS704 blade server, you must first remove the expansion unit. For more information, see Removing the expansion unit for a PS704 blade server.
- Locate the DIMM connector that contains
the
DIMM being replaced. Figure 1. DIMM connectors for the PS703
 Figure 2. DIMM connectors for the PS704
 Attention: To avoid breaking the DIMM retaining clips or damaging the DIMM connectors, open and close the clips gently.
 - Carefully open the retaining clips on each end of
the DIMM
connector and remove the DIMM. Note: When replacing DIMM 16 in the PS703 server and DIMM 16 or DIMM 32 in the PS704 server, and if a combination form factor horizontal card (CFFh) is present, lift the blue cam mechanism so that you can maneuver your finger under the blue tab and open the retaining clip.
- Install a DIMM filler in any location where a DIMM is not present to avoid machine damage.
- If you are instructed to return the DIMM, follow all packaging instructions, and use any packaging materials for shipping that are supplied to you.